How to glue a longboard footbrake sole
If you are a longboarder, you will know how important footbraking is - and how fast it destroys shoes!
To this end, we have sourced some footbraking sole kits from our buddy Alex Frischauf at Tikibrakes. Alex is a streetluger, and has spent many, many years destroying shoes. He now sells footbrake sole kits, which contain everything you need to get going. So if you're a monster footbraker, or you're just looking to repair yourskate shoes - you're in the right place!
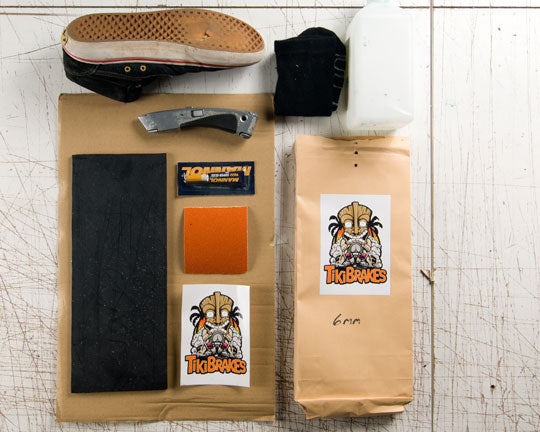
1. Tools Required
You will need:
- A shoe. If you're repairing an old shoe, make sure it has enough life left in the upper!
- Stanley Knife and a brand new blade - this needs to be sharp sharp sharp!!
- Sandpaper - the kit comes with this. Pros use a power sander, ideally mounted to a bench
- Superglue - the kit comes with this
- Footbraking sole - also in the kit
- A bit of rag
- Some solvent - any kind of stripper or degreaser will do.
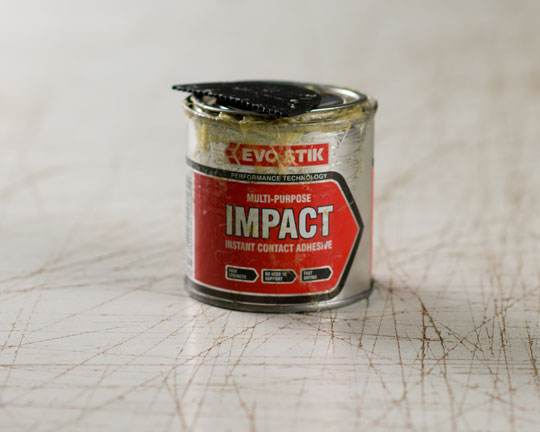
PRO TIP: Use Contact Adhesive.
You can get away with just using the superglue provided in the kit, but if you really want to do a proper job, take your time and use Contact Adhesive. Having tried a few brands out, we recommend Evo-Stik Multi-Purpose "IMPACT" Instant Contact Adhesive - it's super strong and goes off pretty fast.
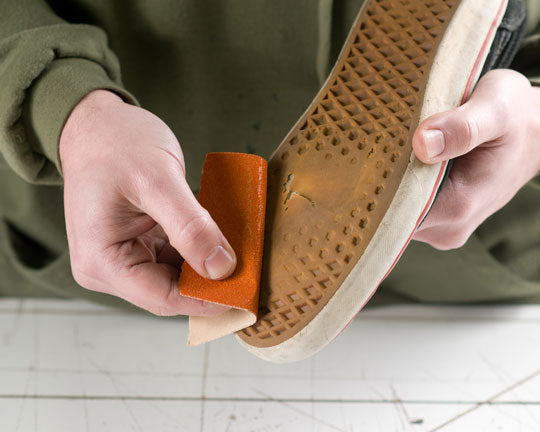
2. Clean and sand your shoe
Sand the sole of your skate shoe down until it's keyed in - "roughed up" - all over the sole. Then blow all the dust off and give it a clean with your rag and solvent - this helps the glue stick better.
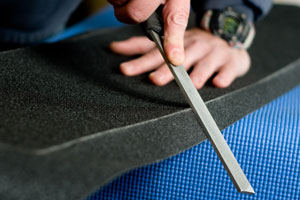
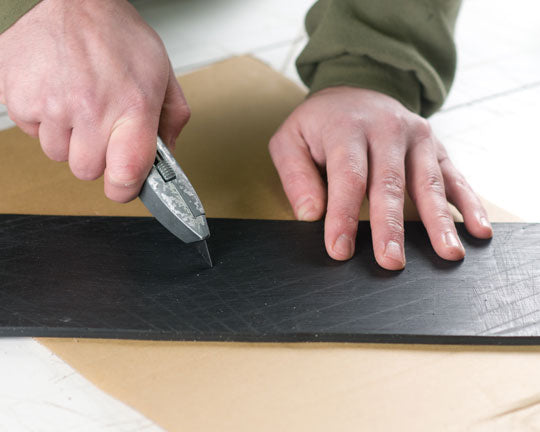
3. Score, sand and clean your sole
Use the knife to score the surface of your sole. This allows the sole to flex a bit more, and also gives the glue something else to hold on to. Once you've done this, sand the whole sole down a bit to key it in, and then give it a clean with your solvent and rag.
We can't emphasise enough how important it is to sand and clean both the sole and the shoe - you want the best bond possible!
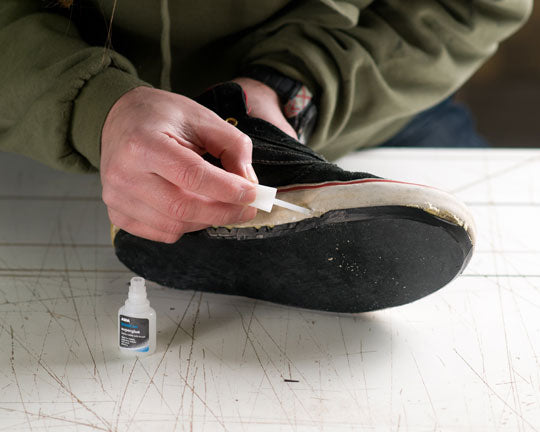
4. Glue it
If you're using just the superglue, spread the glue all over the sole and then stick it on. Cover as much of the sole as possible and be quick - superglue goes off in a few minutes!
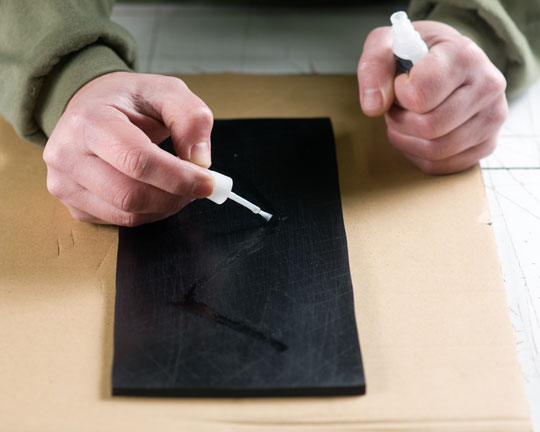
If you're doing a proper job and using the contact adhesive, you'll need to spread a thin layer of glue on both the sole and the shoe before pressing them together. This usually takes about ten minutes - don't apply the sole to the shoe until the glue is 100% dry to touch!

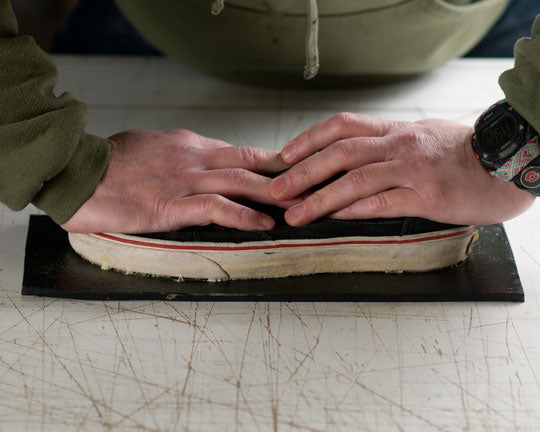
5. Apply the sole
Press the shoe onto the sole and hold it there until the glue has set. With superglue this will only take a minute or two. With contact adhesive it's best to hold the shoe down for a few more minutes, then leave it overnight to fully bond. Although you can often skate both contact adhesive and superglue straight away if you've done a good job up to now.
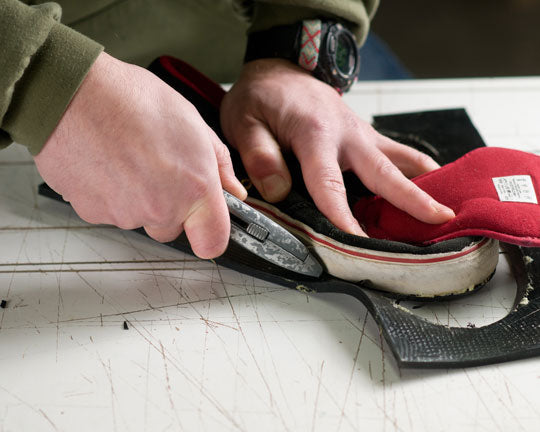
6. Cut the sole down
Use your knife to trim the excess sole off the shoe. Never cut towards your body!! You'll need to use quite a lot of force to cut through the sole - try using several lighter cuts rather than a single deep cut to make things safer and easier. If you can, angle the blade in a bit to create a bit of a chamfer on the sole of the shoe - this stops it catching on the road surface whilst footbraking.
7. Fill in the edges with superglue
Fill any gaps with superglue, and press them together. This is a really important step - if you have gaps at the edge of your shoe, your sole is much more likely to come off. Some skaters even paint a layer of superglue right around the sole as well as filling all the gaps in for extra strength. It's worth checking your soles out every once in a while and re-gluing any gaps that start to appear.