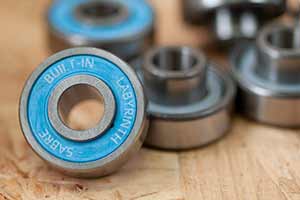
Alright surfskate lovers! Today we're going to run you through the process of stripping, cleaning, regreasing, rebuilding and adjusting a Carver C7 Surfskate truck.
This may appear slightly more daunting than sorting out a set of regular longboard trucks, but it's really not too tricky once you get into it. As we'll see, Carver have made things easy by sticking to standard skate bolt sizes and readily available spares. You've got this!!
Plus, you will not believe the difference this will make to your slighly creaky and stiff Carver surfskate. It's something we do to our shop demo fleet every now and then, and we can tell you... it's REALLY worth doing!!
Your board will be good as new (possibly even better than new!) after you've done this... so let's get stuck in!
- 1: Loosen the pivot bolt
- 2: Take the pivot bolt out
- 3: Take it all apart
- 4: Give it a soak
- 5: Remove the lower truck assembly from the board
- 6: Loosen the Spring Bolt
- 7: Clean Everything Off
- 8: Regrease the Big Thrust Bearing
- 9: Insert the Pivot Bush
- 10: Regrease the Smaller Thrust Bearing
- 11: Insert the Pivot Bolt
- 12: Connect the Pivot link
- 13: Tighten the Pivot Bolt
- 14: Put the truck back on the board
- Bonus round one: The rest of the truck
- Bonus round two: Adjustments
Tools Required
You will need:
- About 30 minutes of your precious time (it's worth it believe us!)
- A Carver C7 equiped surfskate
- Skate tool - an all metal one makes it easier. Alternatively, a 1/2", a 9/16" and a 1/8" socket set will do it.
- A rag
- Some thick bearing grease
- Degreaser or solvent - we use Citrus degreaser for this. Petrol is a good alternative, as is White Spirit. WD40 works if can't find anything else. Engine degreaser or similar will work too. If you're really desperate, you can use washing up liquid and warm water - but make sure you dry everything out properly!!
- A dish (a jam jar lid works well)
- A flat work surface that's clean, dry and well lit, and can deal with the inevitable dirty greasy spillages
- We find a cup of tea really helps. Obviously.


3: Take it all apart
This is the slightly scary bit first time you do it!!
Take the whole top truck assembly (truck arm and hanger) off the board.
You will have eight assorted washers and bearings flying around as you do this.
Lay them out in order so you don't get confused. From the road to the board , the whole assembly goes:
- Pivot Pin
- Top Pivot Washer. This is the same size as the Small bearing washers, but it usually has something like "Do Not Overtighten" or sometimes just the Carver logo on it.
- Small Bearing Washer
- Small Thrust Bearing
- Small Bearing Washer
- Upper truck assembly (Arm and Hanger)
- Inside the upper truck assembly is a bronze cylinder - this is our Pivot Bush. Sometimes this drops out, sometimes it's stuck in there. It's good if you can take it out but not essential.
- Big Bearing Washer
- Big Thrust Bearing
- Big Bearing Washer
- Pivot Pin Nut
- Lower truck assembly
Got the hang of that? Awesome.
It's worth at this point inspecting your Thrust Bearings. You might find that the washers (3,5,810) are a little notched or bumpy. If so - it's time to replace them! You can get replacement C7 Thrust bearings here.


6: Loosen the Spring Bolt
Once the truck is off, have a look at the underneath. You'll see the Pivot Link and a big spring, hopefully all covered in grease.
It's unusual for this to be really dirty, but if it is, take it all apart and give it the same treatment as the other bits (degrease and then regrease).
Most of the time you can just leave this bit alone. You will need to loosen off the Spring Bolt though - this will make it much easier to put everything back together again later.
There will be some rubber risers in between the board and the truck, set these to one side.

7: Clean Everything Off
Get all the stuff that's in the degreaser and give it a good wipe down with your rag.
Set things out in order as you do this to keep things organised.
Wipe down all the other bits with your rag, including the Pivot Bolt and the Truck itself, especially the bit that the washers go on.
Just get everything looking as clean as you can, basically.... it'll last longer and skater better if it's not covered in road gunge!

8: Regrease the Big Thrust Bearing
Get one of the Big Bearing Washers, smear it in grease and put it back on the lower truck.
Then get the Big Thrust Bearing and stick it onto the washer. The grease you put on there should stick it on well enough.
Finally get other Big Bearing Washer, smear that in grease and stick it on top.
You should now have a Bearing Sandwhich on your lower truck - the Big Washers are the bread, and the Big Thrust Bearing and grease are the Marmite and Cheese. Or whatever you usually have in your analogious sandwhiches.

9: Insert the Pivot Bush
Grab the Pivot Bush (that's the small bronze cylinder that you hopefully extracted from the Upper Truck Assembly in step 3.7), smear it in grease inside and out, and stick it back in the Truck Arm.
If you couldn't get this out earlier, just stick a load of grease in there and be happy. It'll still work!
Now you can put the Upper Truck assembly back on top of the bearing sandwhich.


11: Insert the Pivot Bolt
Smear a bit of grease on the Pivot Bolt for good measure.
Then slide it all the way through both bearing sandwhiches until it pokes out of the bottom of the truck.
Stick the nut on the end and give it a couple of turns to stop it falling off.
This can be a bit fiddly but persevere and you'll get there!

12: Connect the Pivot link
This is where you can rejoice that you loosened the Spring Bolt way back in Step Four.
If you turn the truck over, you will see that there is a little pin on the bottom of the Truck Arm. This needs to go through the hole on the Pivot Link.
Again this can be a little fiddly but you'll get there. Loosen the Spring Bolt as far as you can if you're having trouble!
Once you've got it in, tightnen the Spring Bolt back up a bit.

13: Tighten the Pivot Bolt
You need to spend a bit of time getting the tightness of this pivot bolt right.
Too tight and the bearings will be crushed, your truck won't turn and your board will be not very fun.
Too loose and your truck will be rattly and might even fall to bits mid skate! Which would be rubbish.
We find it's best to tighten it up fairly tight, enough that the truck rotates freely, without any "play" or wobble in the assembly.
You can always play with this later if you need to - just be aware of the dangers of too tight or too loose and you'll be fine.

14: Put the truck back on the board
Don't forget your risers!
By the way, if you're getting wheelbite or you want to put bigger wheels on your surfskate - this is the moment to put on a C7 Double Lift Kit.

Bonus round one: The rest of the truck
By now you have probably noticed that a Carver C7 truck is basially a regular skate truck on top of a spring loaded shopping trolley.
You've done the spring loaded shopping trolley bit - which is the hard bit. Congratulations!
But it's also worth dealing with the "regular" part of the truck, and the rear truck while you're at it.
As these are basically the same as any other longboard or skateboard truck, this is pretty straightforward. You can find a nice tutorial that will take you through that here.
Please note that the bushings and Pivot Cups are both sacrificuial parts and will need replacing every now and then.
You can get C7 Pivot Cups here, and for bushings you can use a Sabre Street Kit for the front, and a Sabre Carve Kit for the back.

Bonus round two: Adjustments
Unlike a more conventional skate truck, a Carver C7 has TWO things you can play with that will change the way the truck skates.
Now that you've taken one apart, you might have an understanding of how they work.
- Spring Bolt. This is the Bolt at the back of the truck's baseplate. It's what gives the Carver C7 the magical feeling that you wont get from a regular skate truck. This controls how much the truck rotates and turns.
- Kingpin Nut. This is the the same as a normal truck. Loosen or tighten this to give more "lean." We recommend have this as loose as you can, but heavier riders might want to tighten it down a bit.
- Pivot Pin. This doesn't adjust the truck, but needs to be set tight enough so that there's no wobble in the pivot, and loose enough to allow the truck to turn. See step 13 above!
It's worth noting that the two adjustments do need to work together to an extent.
For example if you have the regular kingpin loosened right off and the Pivot Bolt done up really tight, then your board will feel much more like a normal skateboard. Which is presumably not what you want!
Conversely, if you have the kingpin up really tight, and the pivot bolt really loose, you'll find that a wheel will come off the ground when pumping really hard, you'll have less grip and could well fall off.
You can adjust either of these with a regular skate tool, so we really recommend that you have a play with different tighnesses and see what you like.
Tighter will be be better at speed, and looser will be more "surfy" but potentially a bit of a handful.